
Blog 3 mins reading time
Creating User Profiles in Keycloak using Keycloak config cli (Part 3/3)

Introduction
Keycloak’s User Profile feature allows administrators to define and manage custom attributes for users, providing a structured and flexible approach to handling user information. This guide walks you through creating user profiles using a configuration file and Keycloak Config CLI. It builds on the previous articles, Keycloak Starter Guide and Creating Users Using Keycloak Config CLI.
Prerequisites
-
A running Keycloak instance (see Keycloak Starter Guide)
-
Keycloak Config CLI installed (Keycloak Starter Guide)
-
Administrative access to Keycloak.
-
A properly configured Keycloak realm (created in the Keycloak Starter Guide)
Step 1: Setting Up User Profiles
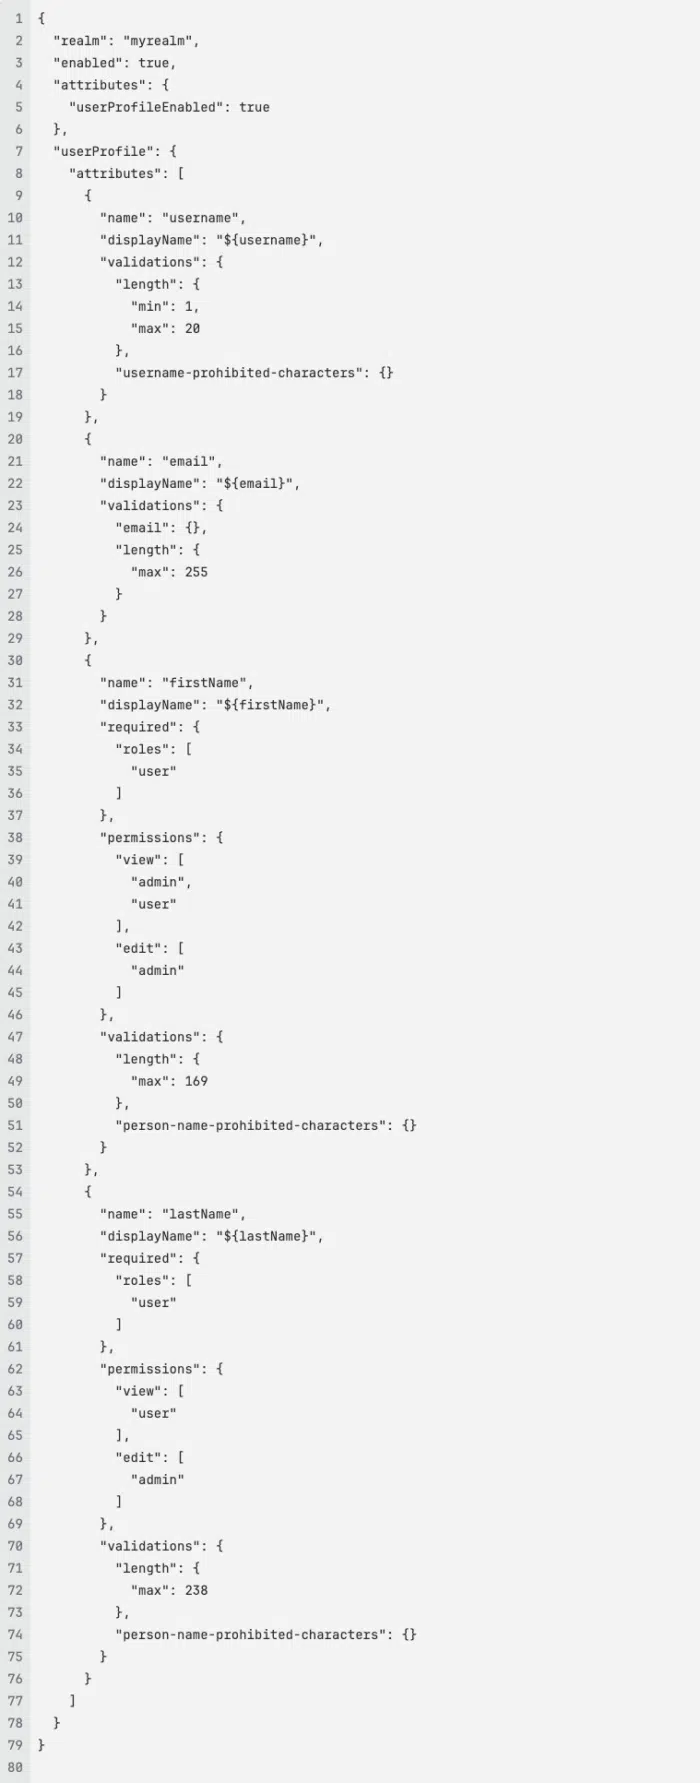
To create user profiles in Keycloak, define a JSON configuration file that specifies the realm and user profile attributes.
- Create a JSON file named user-profile-config.json and put it into the ./configs folder.
- Add the following content:

Step 2: Import the Configuration Using Keycloak Config CLI
Run the following command to apply the configuration:
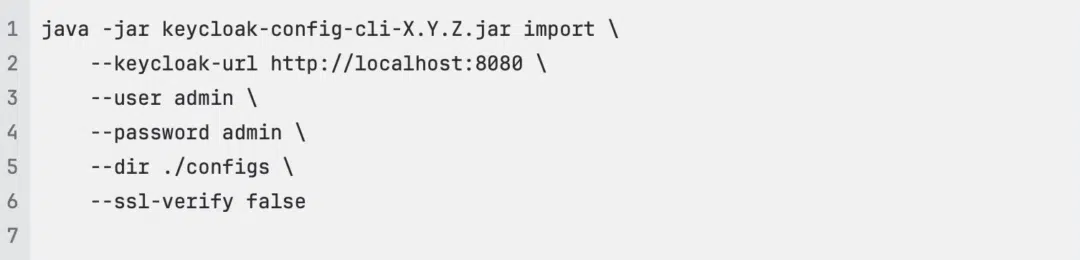
- Replace X.Y.Z with the actual version number of Keycloak Config CLI.
Security Note: The –ssl-verify false option disables SSL certificate verification. This is acceptable for local development, but never use it in a production environment. In production, use a valid SSL certificate and keep –ssl-verify set to true.
Step 3: Verify the User Profile Configuration
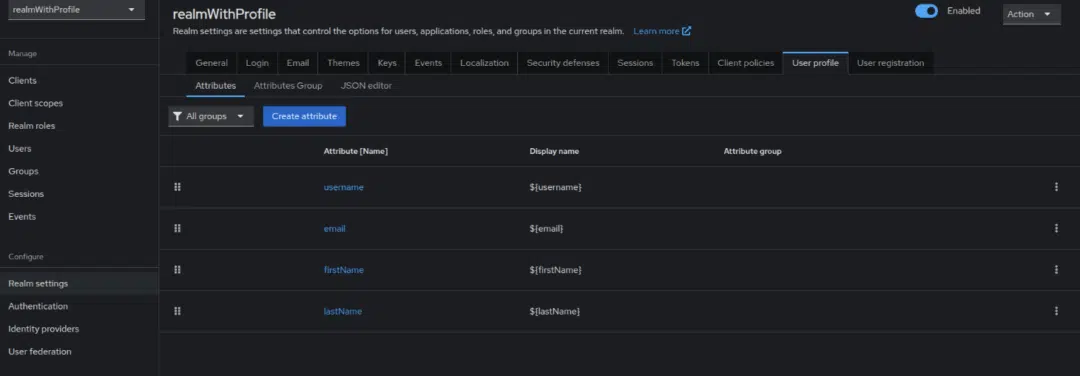
- Log in to the Keycloak Admin Console at http://localhost:8080.
- Navigate to Realm Settings.
- Select the User Profile tab. You should see the configured attributes (username, email, firstName, lastName) and their associated validations and permissions.
Step 4: Understanding the Configuration
Realm Settings
- “enabled”: true: Activates the realm.
- “realm”: “myrealm”: Defines the name of the realm. This must match the realm created in the previous articles.
- “attributes”: { “userProfileEnabled”: true }: Enables the user profile feature for the realm.
User Profile Attributes
The configuration defines four attributes: username, email, firstName, and lastName. Each attribute has specific settings:
Username
-
Length validation: 1-20 characters.
-
Prohibited character validation: Prevents the use of certain characters.
-
Email format validation: Ensures the value is a valid email address.
-
Maximum length: 255 characters.
First Name
-
Required for users with the user role.
-
Permissions:
-
Viewable by admin and user roles.
-
Editable by the admin role.
-
-
Maximum length: 169 characters.
-
Prohibited character validation for person names.
Last Name
-
Required for users with the user role.
-
Permissions:
-
Viewable by the user role.
-
Editable by the admin role.
-
-
Maximum length: 238 characters.
-
Prohibited character validation for person names.
Step 5: Benefits of User Profiles
- Customization: Tailor user information to your application’s needs.
- Validation: Ensure data quality with built-in and custom validations.
- Role-based Requirements: Set attribute requirements based on user roles.
- Fine-grained Permissions: Control who can view and edit specific attributes.
Conclusion
Following these steps, you can effectively define and manage user profiles in Keycloak using Keycloak Config CLI. This approach ensures structured user data management with configurable validation and permissions, making your Keycloak setup more robust and adaptable to your application’s requirements.
Keen to explore how adorsys can guide your company through technology innovation? Reach out to us here, our team will be delighted to discuss tailored solutions for your organisation.
Written by Victoire Motouom, Fullstack Developer at adorsys Cameroon.